Plan Track Revise - Creating your First Project Quick Guide
Extract from the original help guide
The following is a quick guide to creating your first project plan using PlanTrackRevise.com.
In order to perform these steps you will need to have either a Manager or an Administrator user account.
First you will need to login in to the platform using your email address and password. If this is your first login then you will be asked to agree to the Acceptable Use Policy and then change your password.
Having successfully logged in a page similar to that shown below will be displayed. Note, that for an Administrator there will be more options on the main menu on the left-hand side.
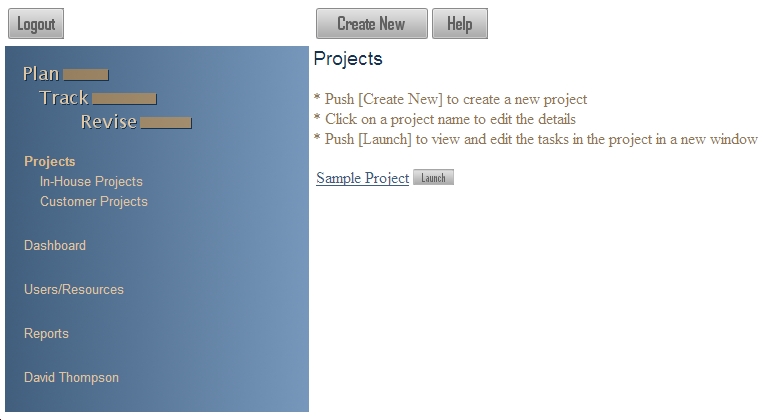
To create a new project, a project folder must be selected in the main menu on the left-hand side, in the screen shot above "Projects" is selected. Push the [Create New] button. On the resulting page you can enter a project name and start date, leaving the rest of the fields on their default values. Pushing [Save] will create the new project, showing a page similar to that shown below.
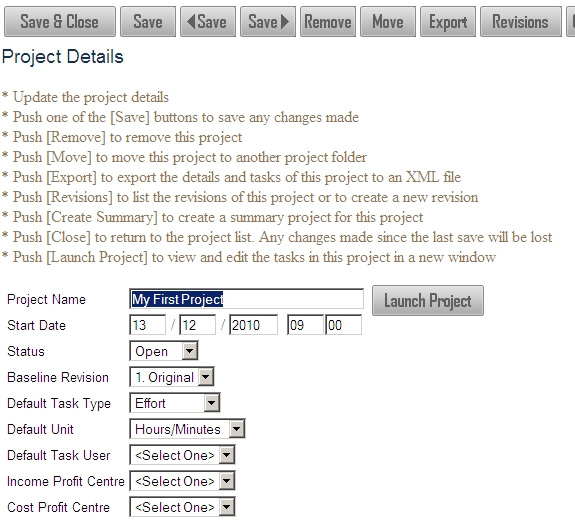
You can then push the [Launch Project] button to open a project viewer window containing the project plan. If a window does not open then please check that popups are not blocked for this website in your browser.
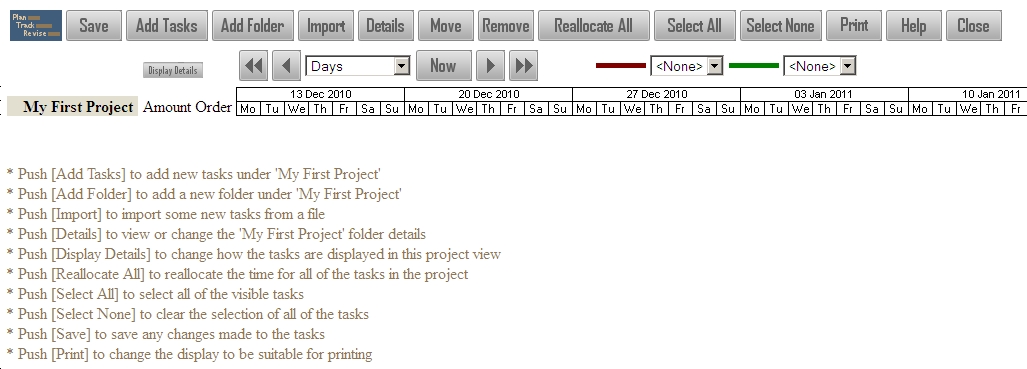
The project viewer is divided into three sections: the buttons along the top; the navigator and display functions; and then the main Gantt chart section. As tasks and folders are added their details will be displayed in the main Gantt chart section.
To add some tasks to the project plan push the [Add Tasks] button. Up to five tasks can be added at a time, the initial display is set up so that you can enter the "Amount" for each task. The default task type is set to "Effort" in this example, so enter the effort for each task here.
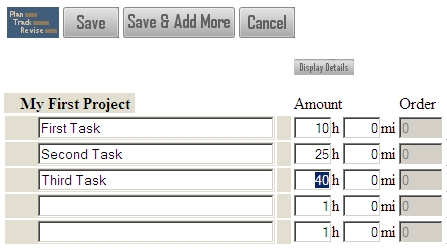
Having entered the details of the tasks push the [Save] button to add them. To view or change the details of a task, you can select it by clicking on the task name (it will become bold) and then pushing the [Details] button.
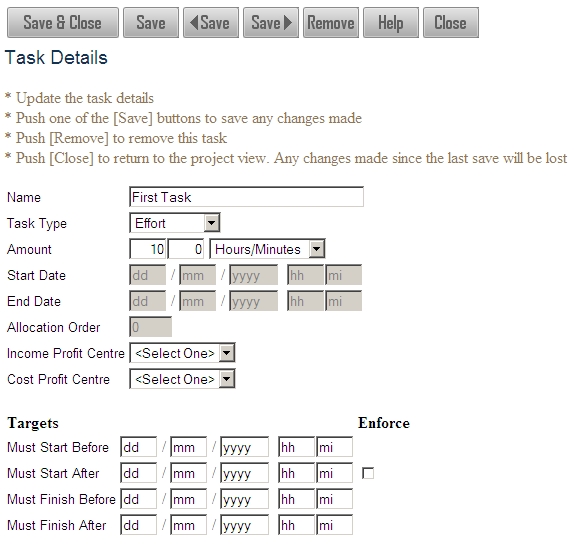
Pushing the [Close] button will return to the main plan. Next you can assign users or resources to each task by selecting the required task (it will become bold) and then pushing the [Assignments] button.
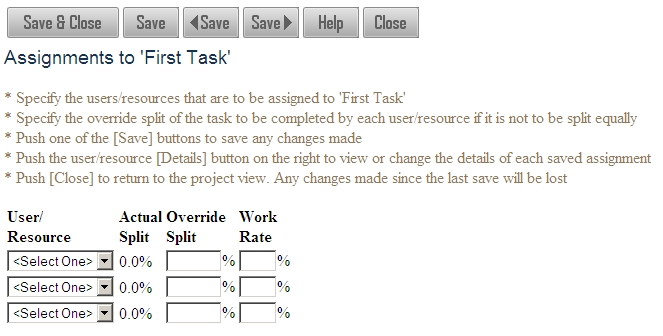
The "User/Resource" drop-down list will contain a list of all of the users and resources that you can employ in a plan. For a Manager the users/resources that can be used are set by an Administrator, Administrators can use all users/resources. Select a user/resource on the first row and push [Save & Close].
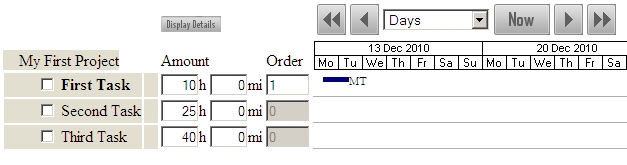
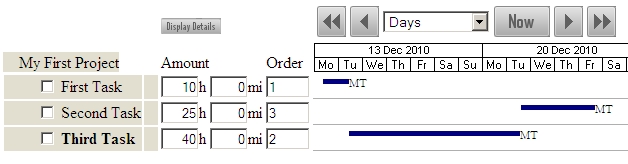
A blue bar has now appeared on the plan, representing the allocation of the selected user/resource to the task. They have been allocated at their next free time after the beginning of the project. In the same way you can allocate the same user/resource to the other tasks.
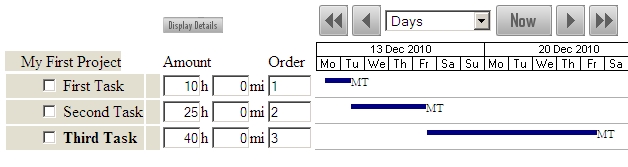
As you assign users/resources the allocations will be made in order. As the same user/resource is allocated to the other tasks their next available free time becomes later. If the mouse is hovered over the blue bars or the task names a hintbox will show the dates and times of the task.
As users/resources were assigned to each task the "Order" column was set for that task. This is the allocation order for the tasks. To allocate the tasks in a different order you can change this order and push the [Save] button. The tasks will then be allocated in a different order.
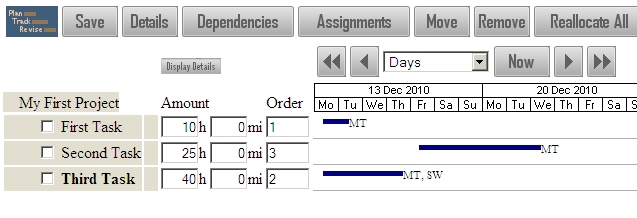
More than one user/resource can be assigned to each task, reducing the length of time it takes to complete. If you select a task and assign another user/resource to it the task will be split between the two users/resources. The following is an example of doing this and then pushing [Save] (rather than [Save & Close]) on the assignments page.

On pushing [Close] on the assignments page you will see that this has changed the allocation of the task.
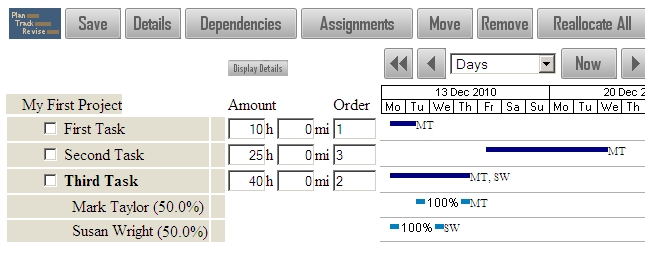
If the already-selected task name is clicked on again it will be expanded and you will see the breakdown of the task to each user/resource assigned.
This has been a quick introduction to creating a project. At any stage more information can be found by pushing the [Help] button on a page.